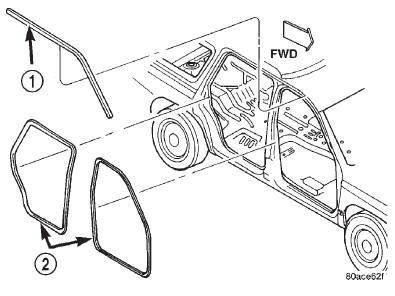
Front door opening weatherstrip. Front door secondary seal
REMOVAL (1) Remove A-pillar trim.
(2) Remove lower cowl trim. (3) Remove door sill trim.
(4) Loosen upper and lower B-pillar trim to access
weatherstrip.
(5) Pull weatherstrip from pinch flange around
door opening (Fig. 41).
1 - UPPER BODY SEAL 2 - PRIMARY DOOR SEAL INSTALLATION (1) Clean pinch flange
(2) Position the weatherstrip on the pinch flange
around door opening and press into place.
(3) Press B-pillar trim into place.
(4) Install lower cowl trim.
(5) Install door sill trim. Ensure the clips attaching
the sill trim to the door sill are fully seated.
(6) Install A-pillar trim. REMOVAL (1) Remove the push-in fasteners attaching the
secondary seal to the inner door panel.
(2) Separate the secondary seal from the inner
door panel. INSTALLATION (1) Position the secondary seal on the inner door
panel.
(2) Install the push-in fasteners attaching the secondary
seal to the inner door panelFront door opening weatherstrip
 Fig. 41 Door Opening Weatherstrip
Front door secondary seal
Dodge Durango (DN) 1998-2003 Service Manual
- Lubrication and Maintenance
- Suspension
- Differential and Driveline
- Brakes
- Cooling System
- Battery
- Starting Systems
- Charging System
- Ignition System
- Instrument Panel Systems
- Audio Systems
- Horn Systems
- Speed Control System
- Turn Signal and Hazard Warning Systems
- Wiper and Washer Systems
- Lamps
- Passive Restraint Systems
- Electrically Heated Systems
- Power Distribution System
- Power Lock Systems
- Vehicle Theft/Security Systems
- Power Seat System
- Power Window Systems
- Power Mirror Systems
- Chime/Buzzer Warning Systems
- Overhead Console Systems
- Engine
- Exhaust System
- Frame and Bumpers
- Fuel System
- Steering
- Transmission and Transfer Case
- Tires and Wheels
- Body
- Heating and Air Conditioning
- Emission Control Systems
- Introduction
