A-pillar trim. Door sill trim
REMOVAL (1) Remove A-pillar grab handle, if equipped.
(2) Remove screws from cowl trim cover.
(3) Remove cowl trim cover.
(4) Grasp A-pillar trim and pull outward to disengage
clips attaching A-pillar trim to A-pillar (Fig. 79).
(5) Separate A-pillar trim from vehicle. INSTALLATION (1) Position A-pillar trim at A-pillar, align clips
and press into place.
(2) Install cowl trim cover.
(3) Install A-pillar grab handle, if equipped. REMOVAL (1) Using a trim stick, pry up door sill trim.
(2) Grasp door sill trim and lift upward.
1 - A-PILLAR TRIM 2 - GRAB HANDLE 3 - COWL TRIM COVER (3) Separate door sill trim from vehicle (Fig. 80)
and (Fig. 81).
1 - FRONT DOOR SILL 2 - DOOR SILL TRIM 3 - GROMMET INSTALLATION (1) Position door sill trim on door sill.
(2) Press into place.
1 - GROMMET 2 - DOOR SILL TRIM 3 - REAR DOOR SILLA-pillar trim
Door sill trim
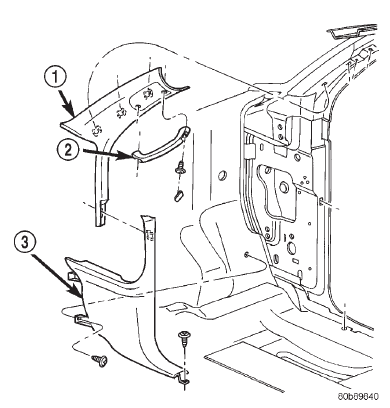 Fig. 79 A-Pillar Trim
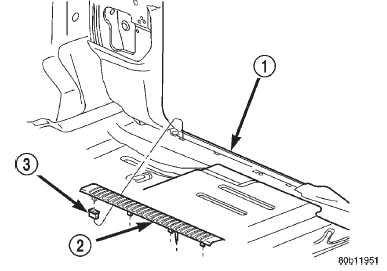 Fig. 80 Front Door Sill Trim
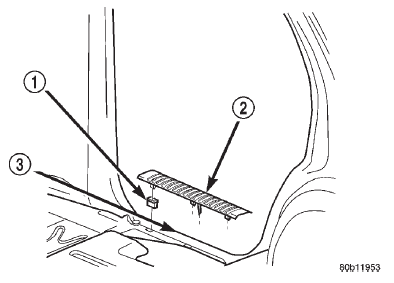 Fig. 81 Rear Door Sill Trim
Dodge Durango (DN) 1998-2003 Service Manual
- Lubrication and Maintenance
- Suspension
- Differential and Driveline
- Brakes
- Cooling System
- Battery
- Starting Systems
- Charging System
- Ignition System
- Instrument Panel Systems
- Audio Systems
- Horn Systems
- Speed Control System
- Turn Signal and Hazard Warning Systems
- Wiper and Washer Systems
- Lamps
- Passive Restraint Systems
- Electrically Heated Systems
- Power Distribution System
- Power Lock Systems
- Vehicle Theft/Security Systems
- Power Seat System
- Power Window Systems
- Power Mirror Systems
- Chime/Buzzer Warning Systems
- Overhead Console Systems
- Engine
- Exhaust System
- Frame and Bumpers
- Fuel System
- Steering
- Transmission and Transfer Case
- Tires and Wheels
- Body
- Heating and Air Conditioning
- Emission Control Systems
- Introduction
Categories
