3Rd row seat. Floor console
REMOVAL (1) Move 2nd row seat to forward tumble position.
(2) Lift 3rd row seat cushion upward and forward
to floor cargo position.
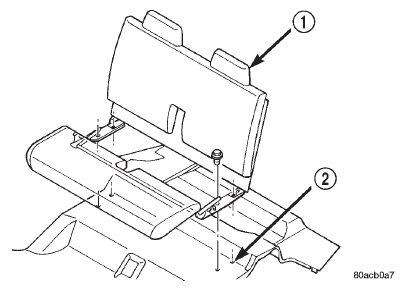
(3) Remove bolts attaching 3rd row seat to floor
pan (Fig. 97).
(4) Remove seat from vehicle.
1 - REAR SEAT 2 - FLOOR PAN
1 - BENCH SEAT 2 - FLOOR PAN INSTALLATION (1) Position seat in vehicle.
(2) Install bolts attaching 3rd row seat to floor pan
(Fig. 97) in the following sequence:
(a) Right front bolt
(b) Left front bolt (c) Left rear bolt
(d) Right rear bolt
(3) Tighten bolts to 27 N*m (20 ft. lbs.) torque.
(4) Move and latch 3rd row seat cushion to seating
position.
(5) Move and latch 2nd row seat to seating position. REMOVAL (1) Using a small flat blade, remove forward and
rearward cup holder inserts.
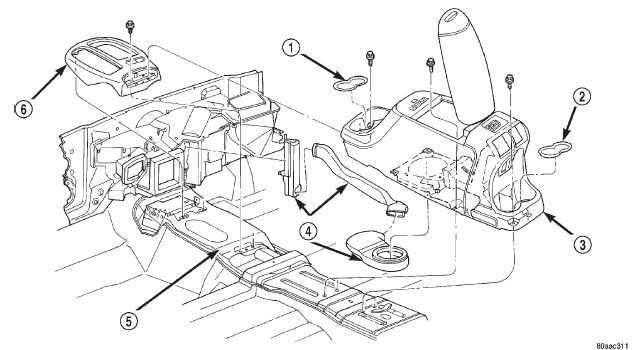
(2) Remove screws attaching floor console to floor
pan (Fig. 98).
(3) Disconnect wire harness for rear HEVAC
blower, if equipped.
(4) Lift console upward and disengage from
HEVAC duct, if equipped.
(5) Separate console from vehicle. INSTALLATION (1) Position console in vehicle.
(2) Engage HEVAC duct to console, if equipped.
(3) Connect wire harness for rear HEVAC blower,
if equipped.
1 - CUP HOLDER INSERT 2 - CUP HOLDER INSERT 3 - FLOOR CONSOLE 4 - HEVAC DUCT 5 - FLOOR PAN 6 - SHIFT BEZEL (4) Install screws attaching floor console to floor
pan (Fig. 98).
(5) Install forward and rearward cup holder inserts.3Rd row seat
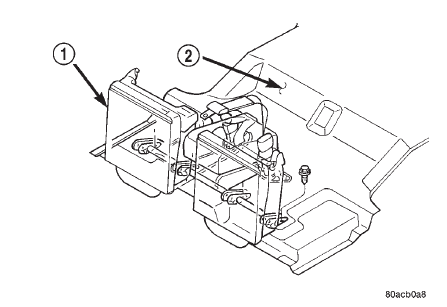
 Fig. 95 2nd Row Seat
 Fig. 97 3rd Row Seat
Floor console
 Fig. 98 Floor Console
Dodge Durango (DN) 1998-2003 Service Manual
- Lubrication and Maintenance
- Suspension
- Differential and Driveline
- Brakes
- Cooling System
- Battery
- Starting Systems
- Charging System
- Ignition System
- Instrument Panel Systems
- Audio Systems
- Horn Systems
- Speed Control System
- Turn Signal and Hazard Warning Systems
- Wiper and Washer Systems
- Lamps
- Passive Restraint Systems
- Electrically Heated Systems
- Power Distribution System
- Power Lock Systems
- Vehicle Theft/Security Systems
- Power Seat System
- Power Window Systems
- Power Mirror Systems
- Chime/Buzzer Warning Systems
- Overhead Console Systems
- Engine
- Exhaust System
- Frame and Bumpers
- Fuel System
- Steering
- Transmission and Transfer Case
- Tires and Wheels
- Body
- Heating and Air Conditioning
- Emission Control Systems
- Introduction
