Liftgate latch striker. Liftgate opening weatherstrip
REMOVAL (1) Remove liftgate trim scuff pad.
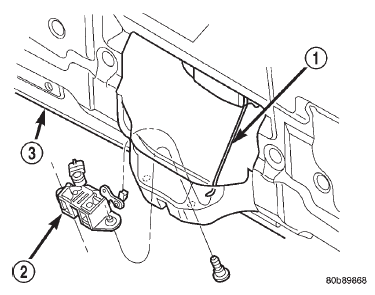
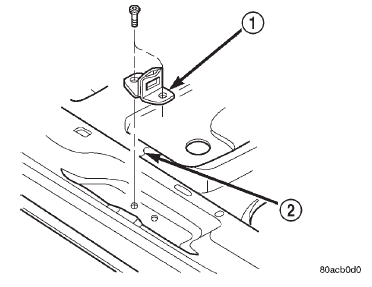
1 - LIFTGATE TO OUTSIDE HANDLE ROD 2 - LATCH 3 - LIFTGATE (2) Remove screws attaching liftgate striker to
floor pan (Fig. 75).
(3) Separate striker from vehicle.
1 - STRIKER 2 - FLOOR PAN INSTALLATION (1) Position striker on vehicle.
(2) Install screws attaching liftgate striker to floor
pan (Fig. 75). Torque screws to 27.8 N*m (20.5 ft.
lbs.) torque.
(3) Install liftgate trim scuff pad. REMOVAL (1) Remove liftgate opening upper trim.
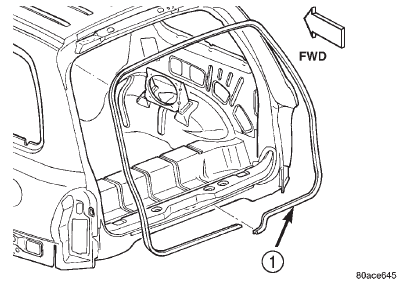
(2) Remove liftgate opening scuff plate. (3) Pull weatherstrip from liftgate opening (Fig.
76).
1 - LIFTGATE OPENING WEATHERSTRIP INSTALLATION (1) Position weatherstrip in liftgate opening and
align corners (Fig. 76).
(2) Press weatherstrip onto flange and carefully
place over quarter panel trim.
(3) Connect ends at bottom/center of liftgate opening.
(4) Install liftgate opening scuff plate.
(5) Install liftgate opening upper trim.
(6) Carefully place weatherstrip over trim using a
fiber stick.Liftgate latch striker
 Fig. 74 Liftgate Latch
 Fig. 75 Liftgate Latch Striker
Liftgate opening weatherstrip
 Fig. 76 Liftgate Opening Weatherstrip
Dodge Durango (DN) 1998-2003 Service Manual
- Lubrication and Maintenance
- Suspension
- Differential and Driveline
- Brakes
- Cooling System
- Battery
- Starting Systems
- Charging System
- Ignition System
- Instrument Panel Systems
- Audio Systems
- Horn Systems
- Speed Control System
- Turn Signal and Hazard Warning Systems
- Wiper and Washer Systems
- Lamps
- Passive Restraint Systems
- Electrically Heated Systems
- Power Distribution System
- Power Lock Systems
- Vehicle Theft/Security Systems
- Power Seat System
- Power Window Systems
- Power Mirror Systems
- Chime/Buzzer Warning Systems
- Overhead Console Systems
- Engine
- Exhaust System
- Frame and Bumpers
- Fuel System
- Steering
- Transmission and Transfer Case
- Tires and Wheels
- Body
- Heating and Air Conditioning
- Emission Control Systems
- Introduction
